
The ACF plugin extends WordPress's basic functionality to enable more complex fields, different layouts, and settings. Using our integration with this plugin, you can import ACF data from a CSV file or other file types without having to add it manually.
Navigate to All Import › New Import and upload a valid import file. Our plugin will automatically identify the file type, i.e., CSV, Excel, XML, etc.
Next, choose from the drop-down list the post type that has the Advanced Custom Fields attached.
In this example, we're importing ACF fields to Posts.
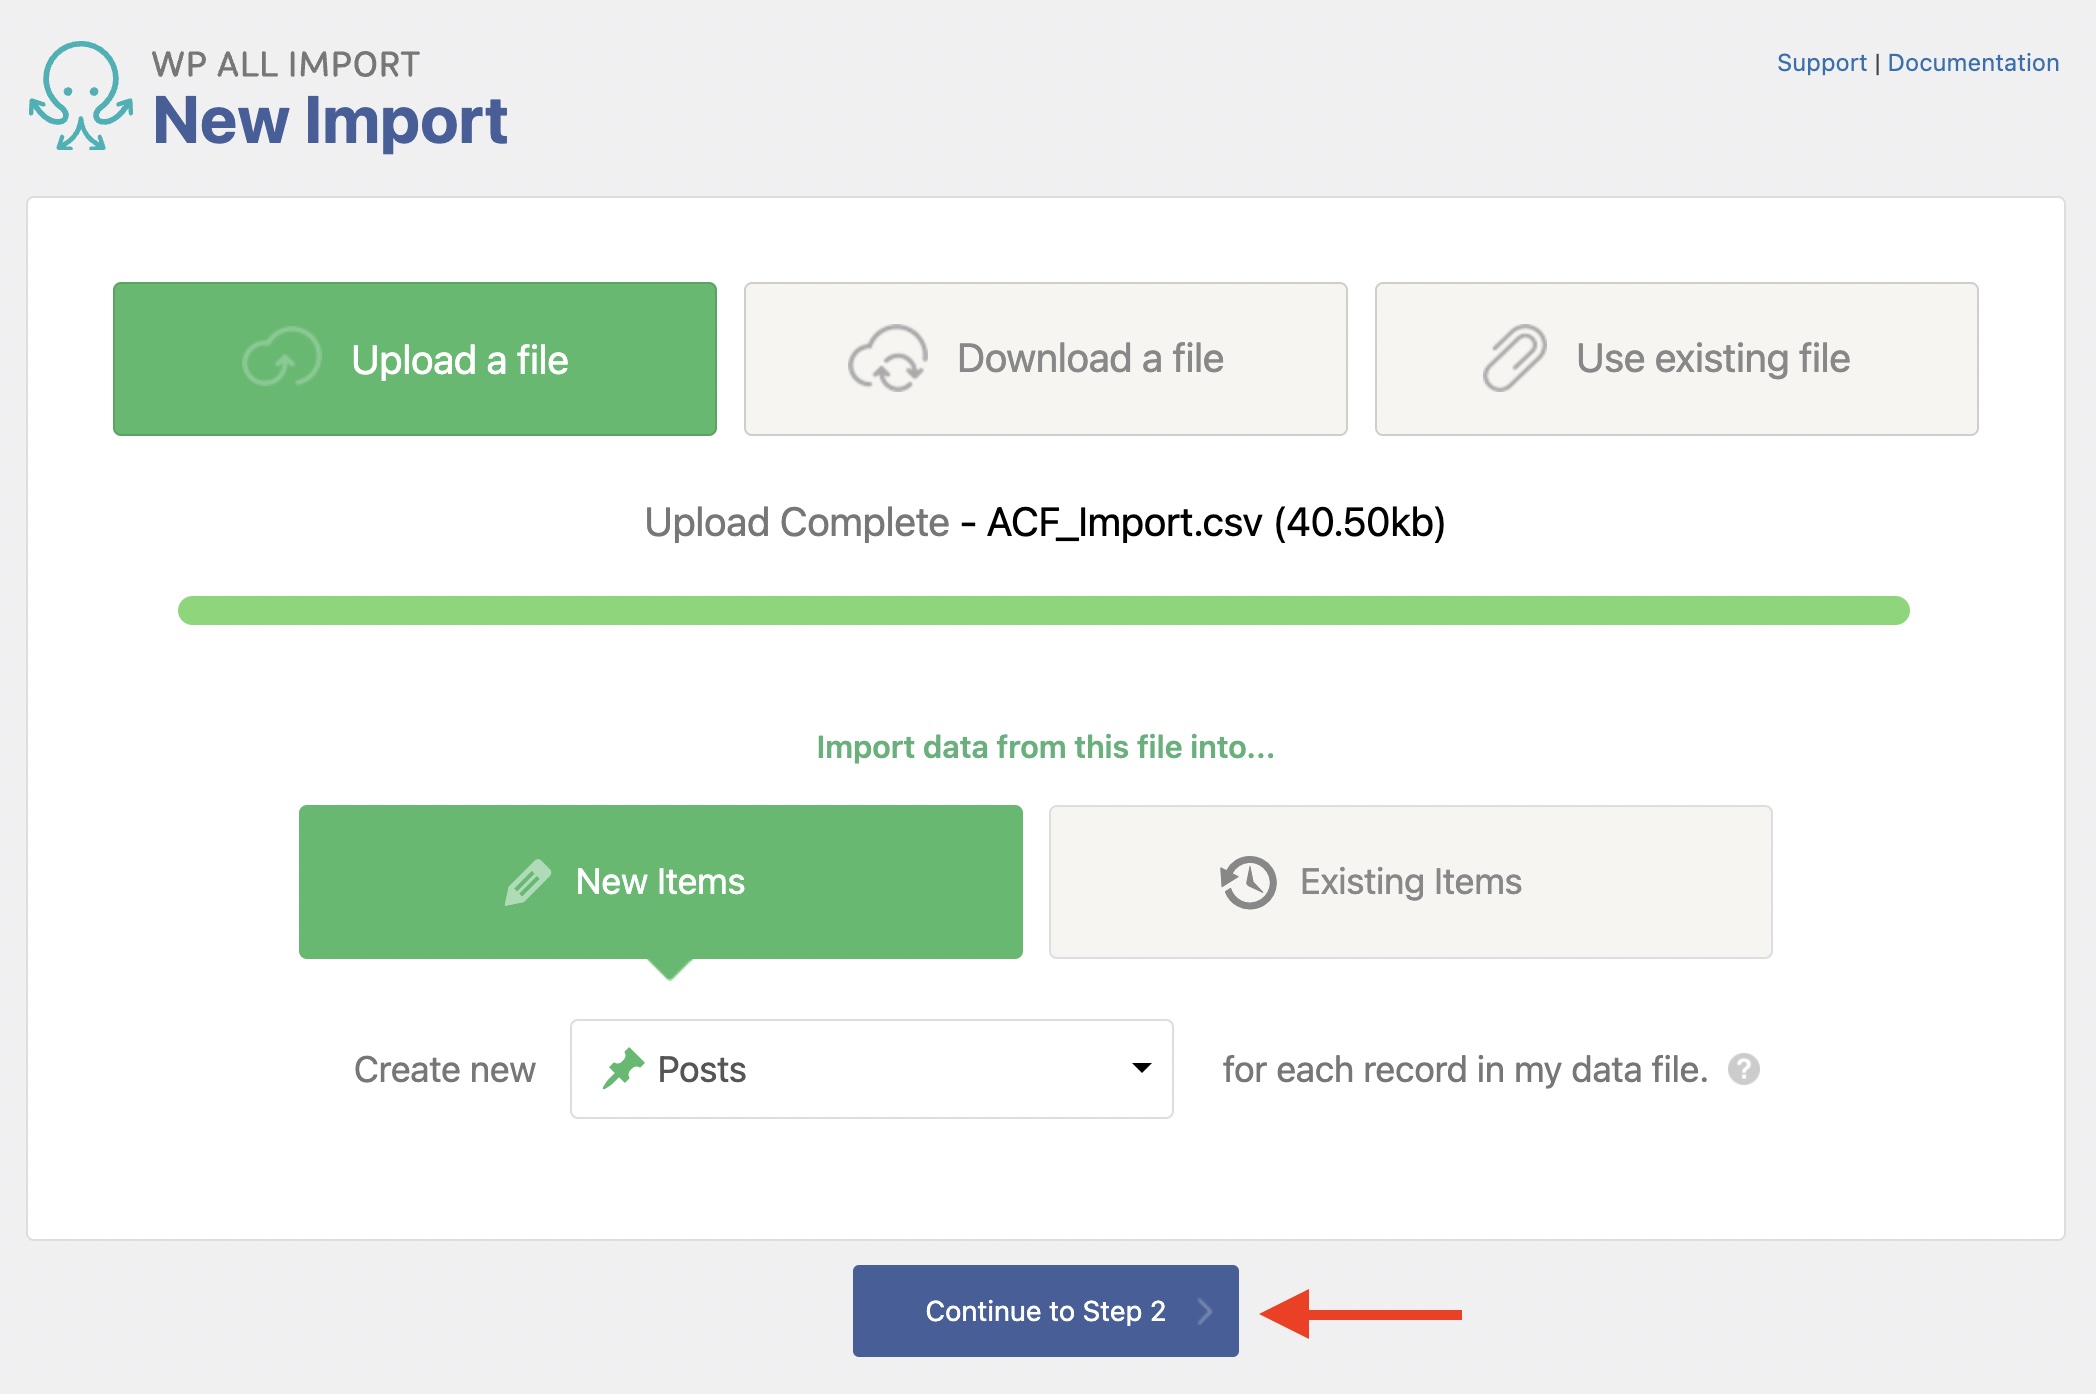
Click Continue to Step 2 to move on to the next step.
Keep in mind that your Advanced Custom Fields and Fields Groups need to be created and defined for posts in the ACF plugin prior to importing data.
If you're not certain how to create the field groups, please review How to Create ACF Fields Groups in the Advanced Topics section below.
The Review Import File interface appears next. Here, you can review and confirm that the import data looks correct:
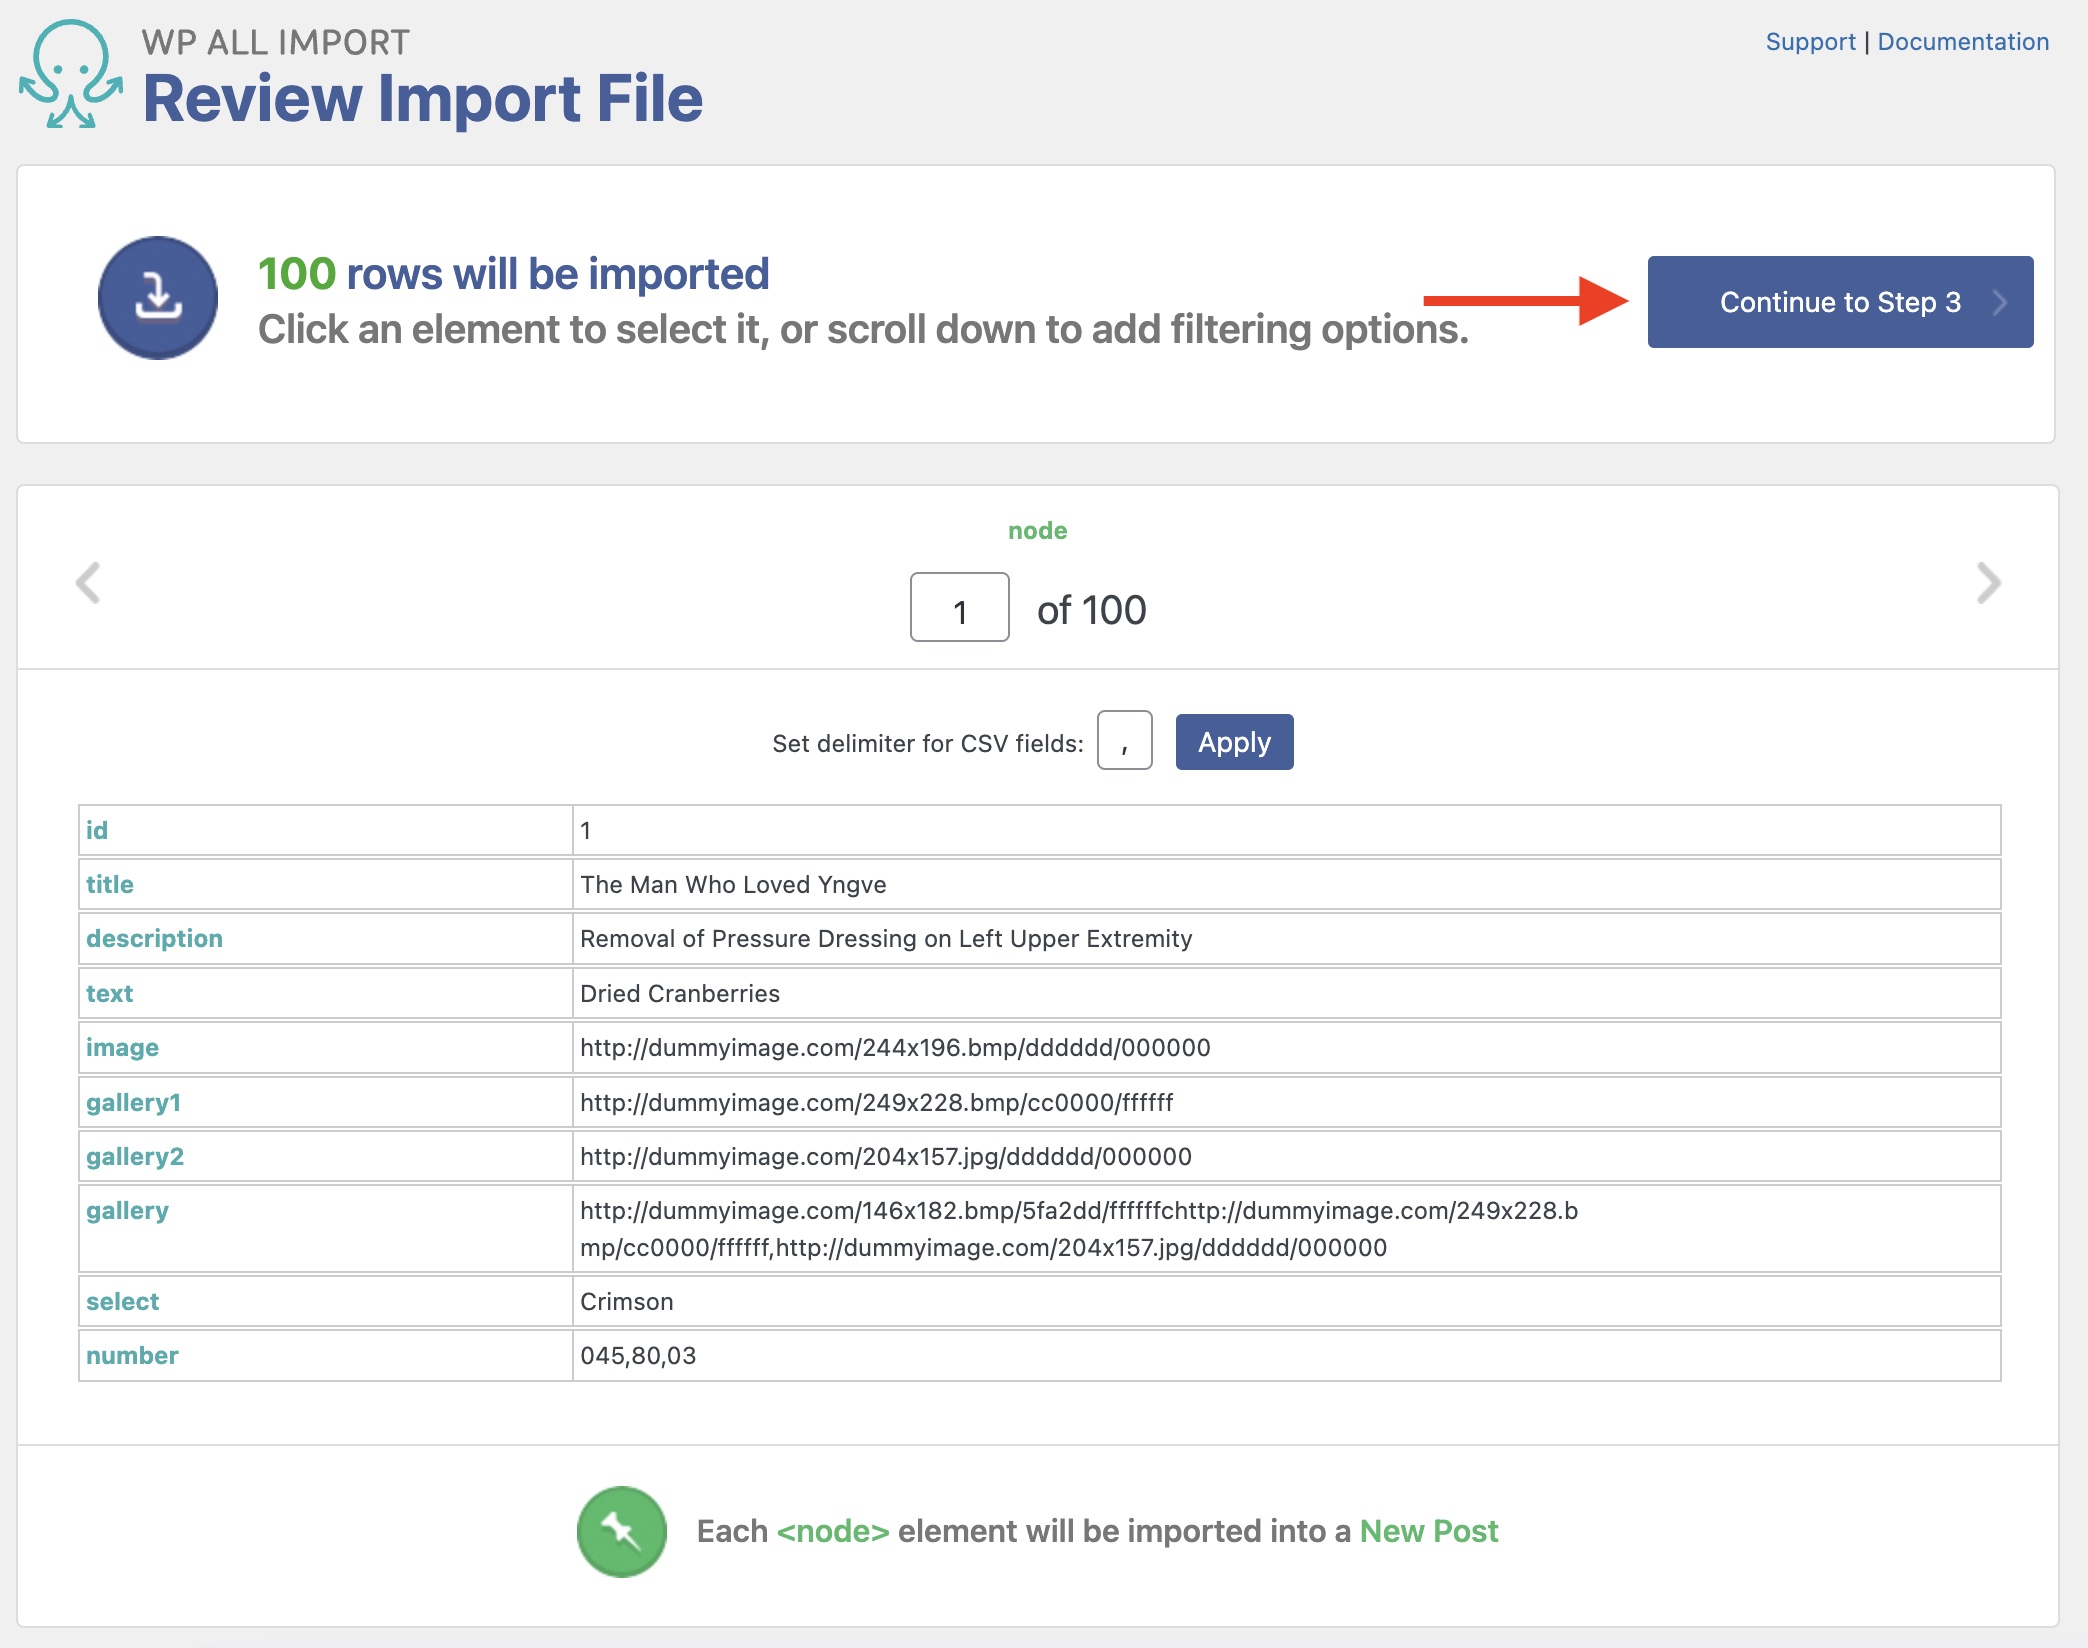
The import has detected 100 records to import. To make sure that the data is correct, you can review each record with the gray arrows at the top.
In this step, you can add filers via the Manage Filtering Options section, if they are needed.
This example uses a CSV spreadsheet. If you import an XML or Excel file, you can decide which will be the main node to import.
Once you confirm that the data looks good, click Continue to Step 3.
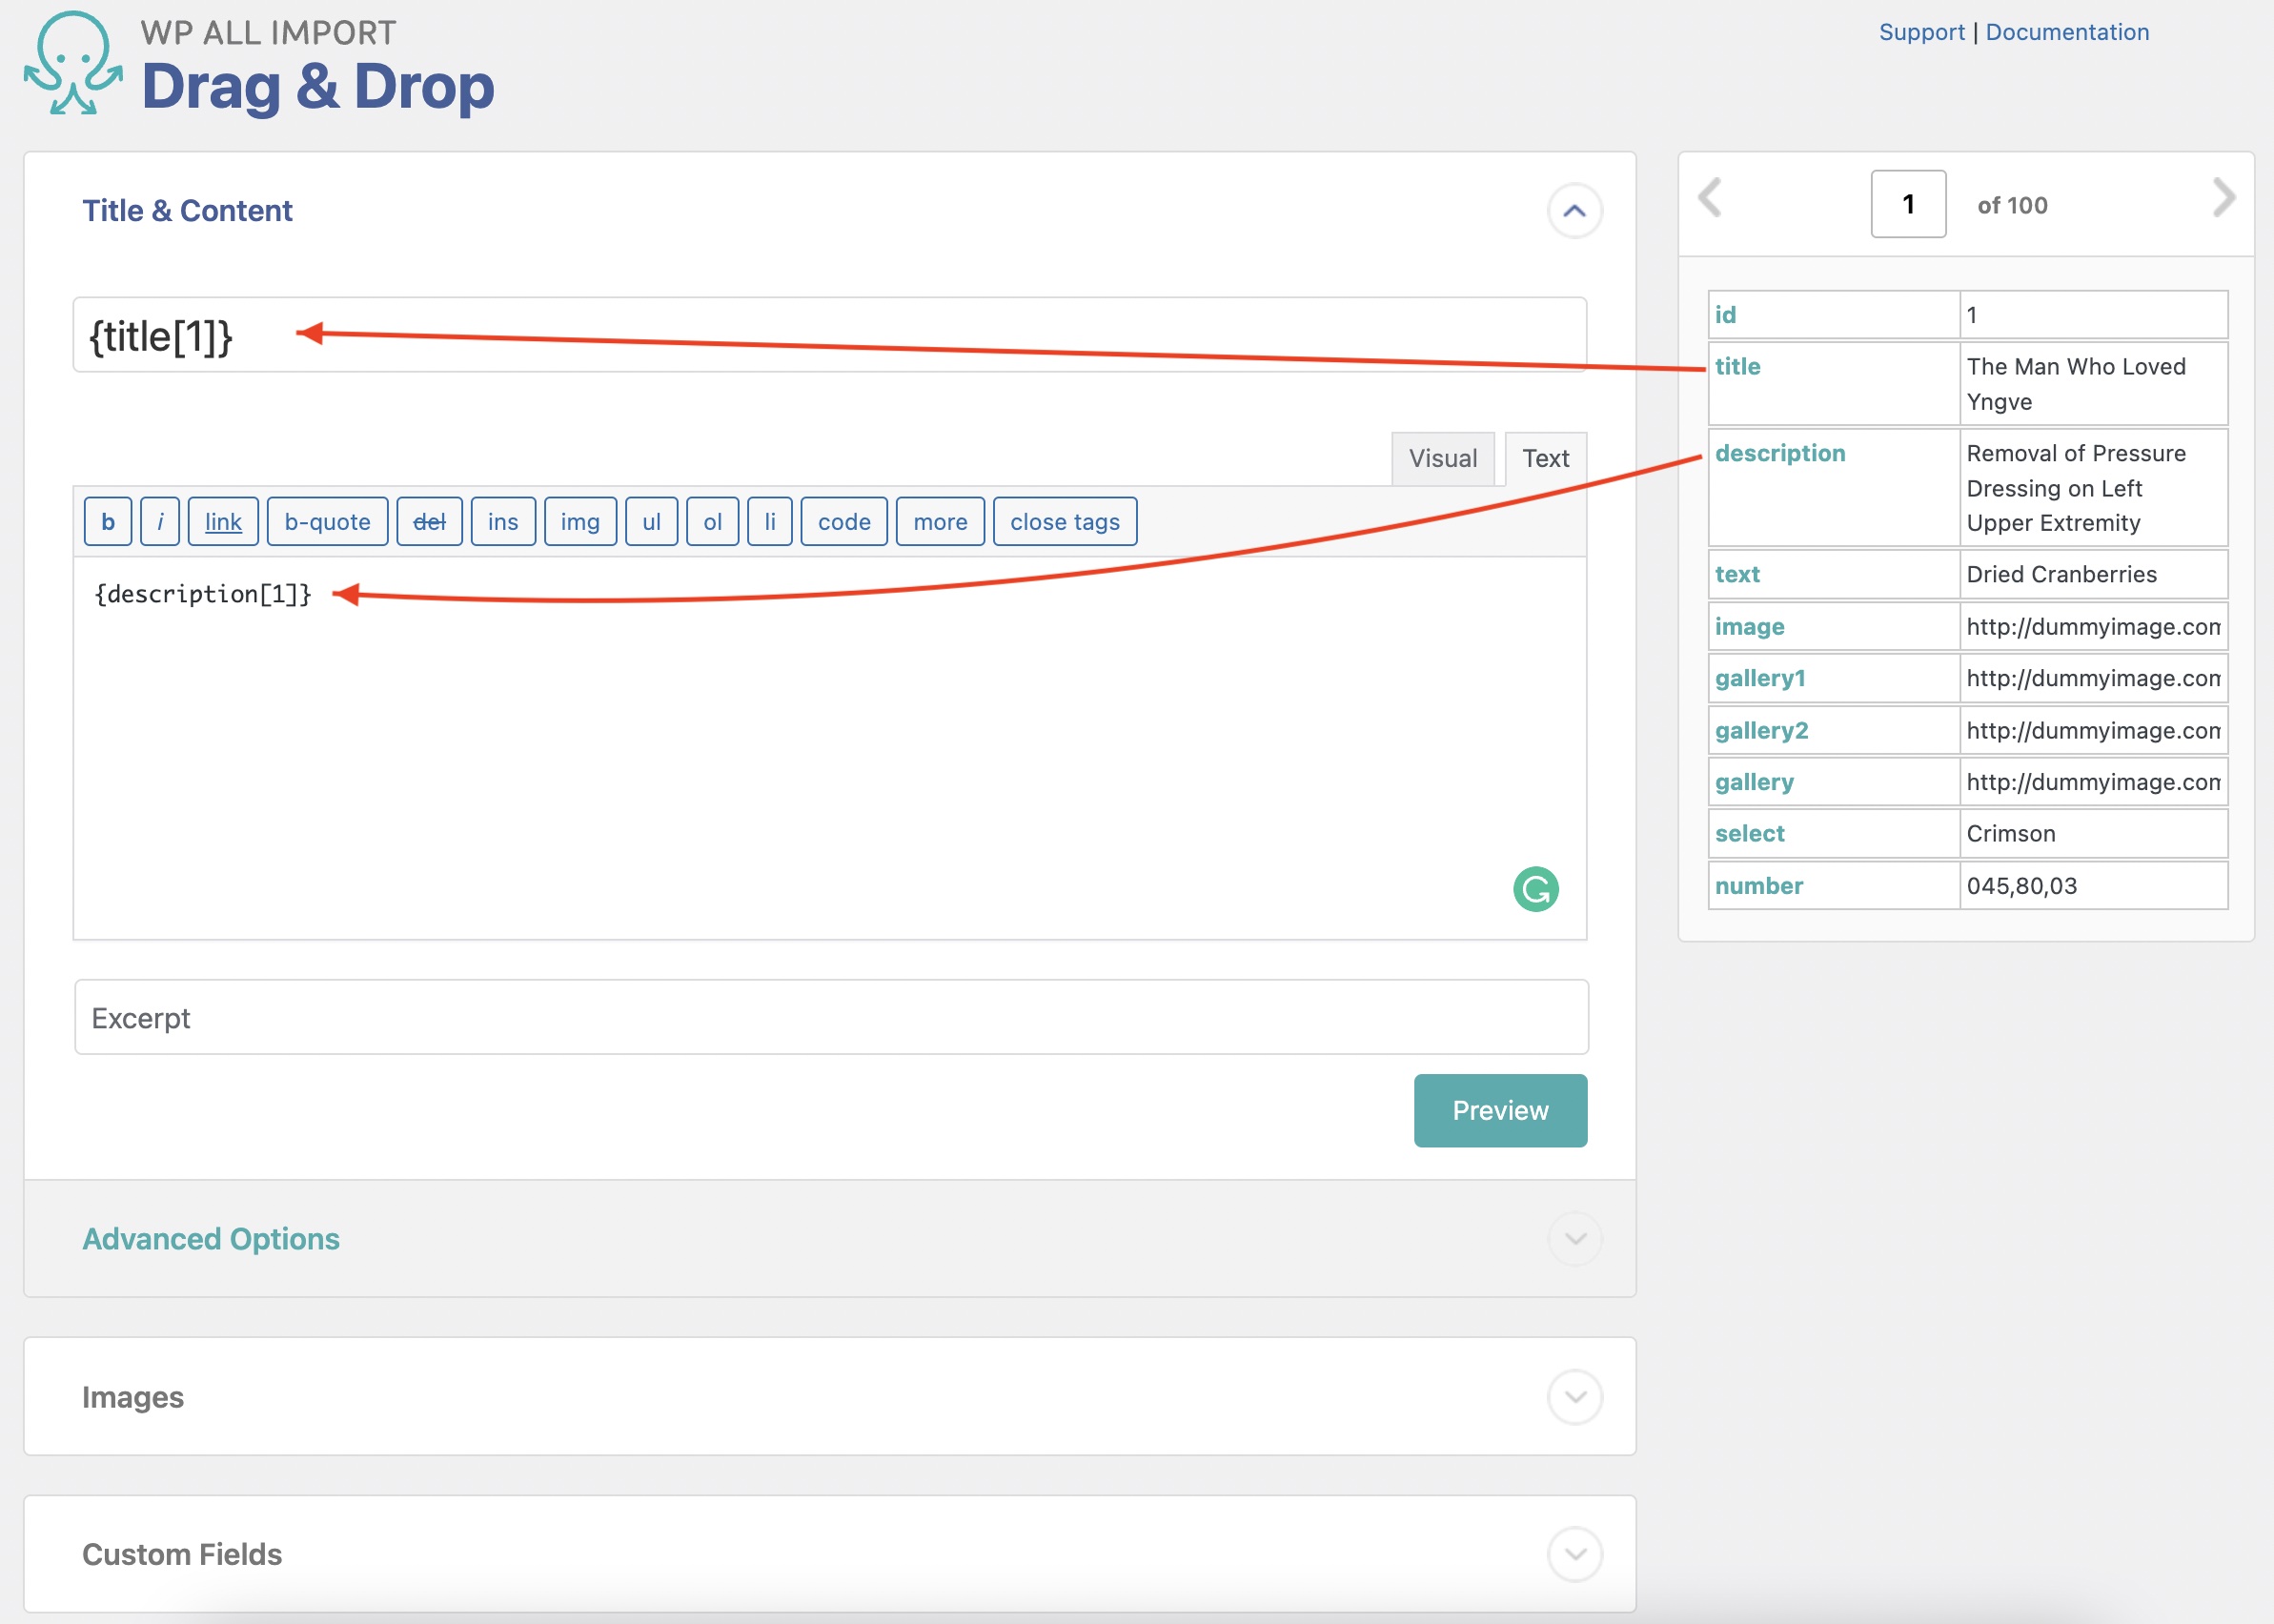
This brings you to the Drag & Drop interface, which allows you to map the data elements to their respective target fields.
To map the data, drag each desired data element from the panel on the right to its corresponding field on the left.
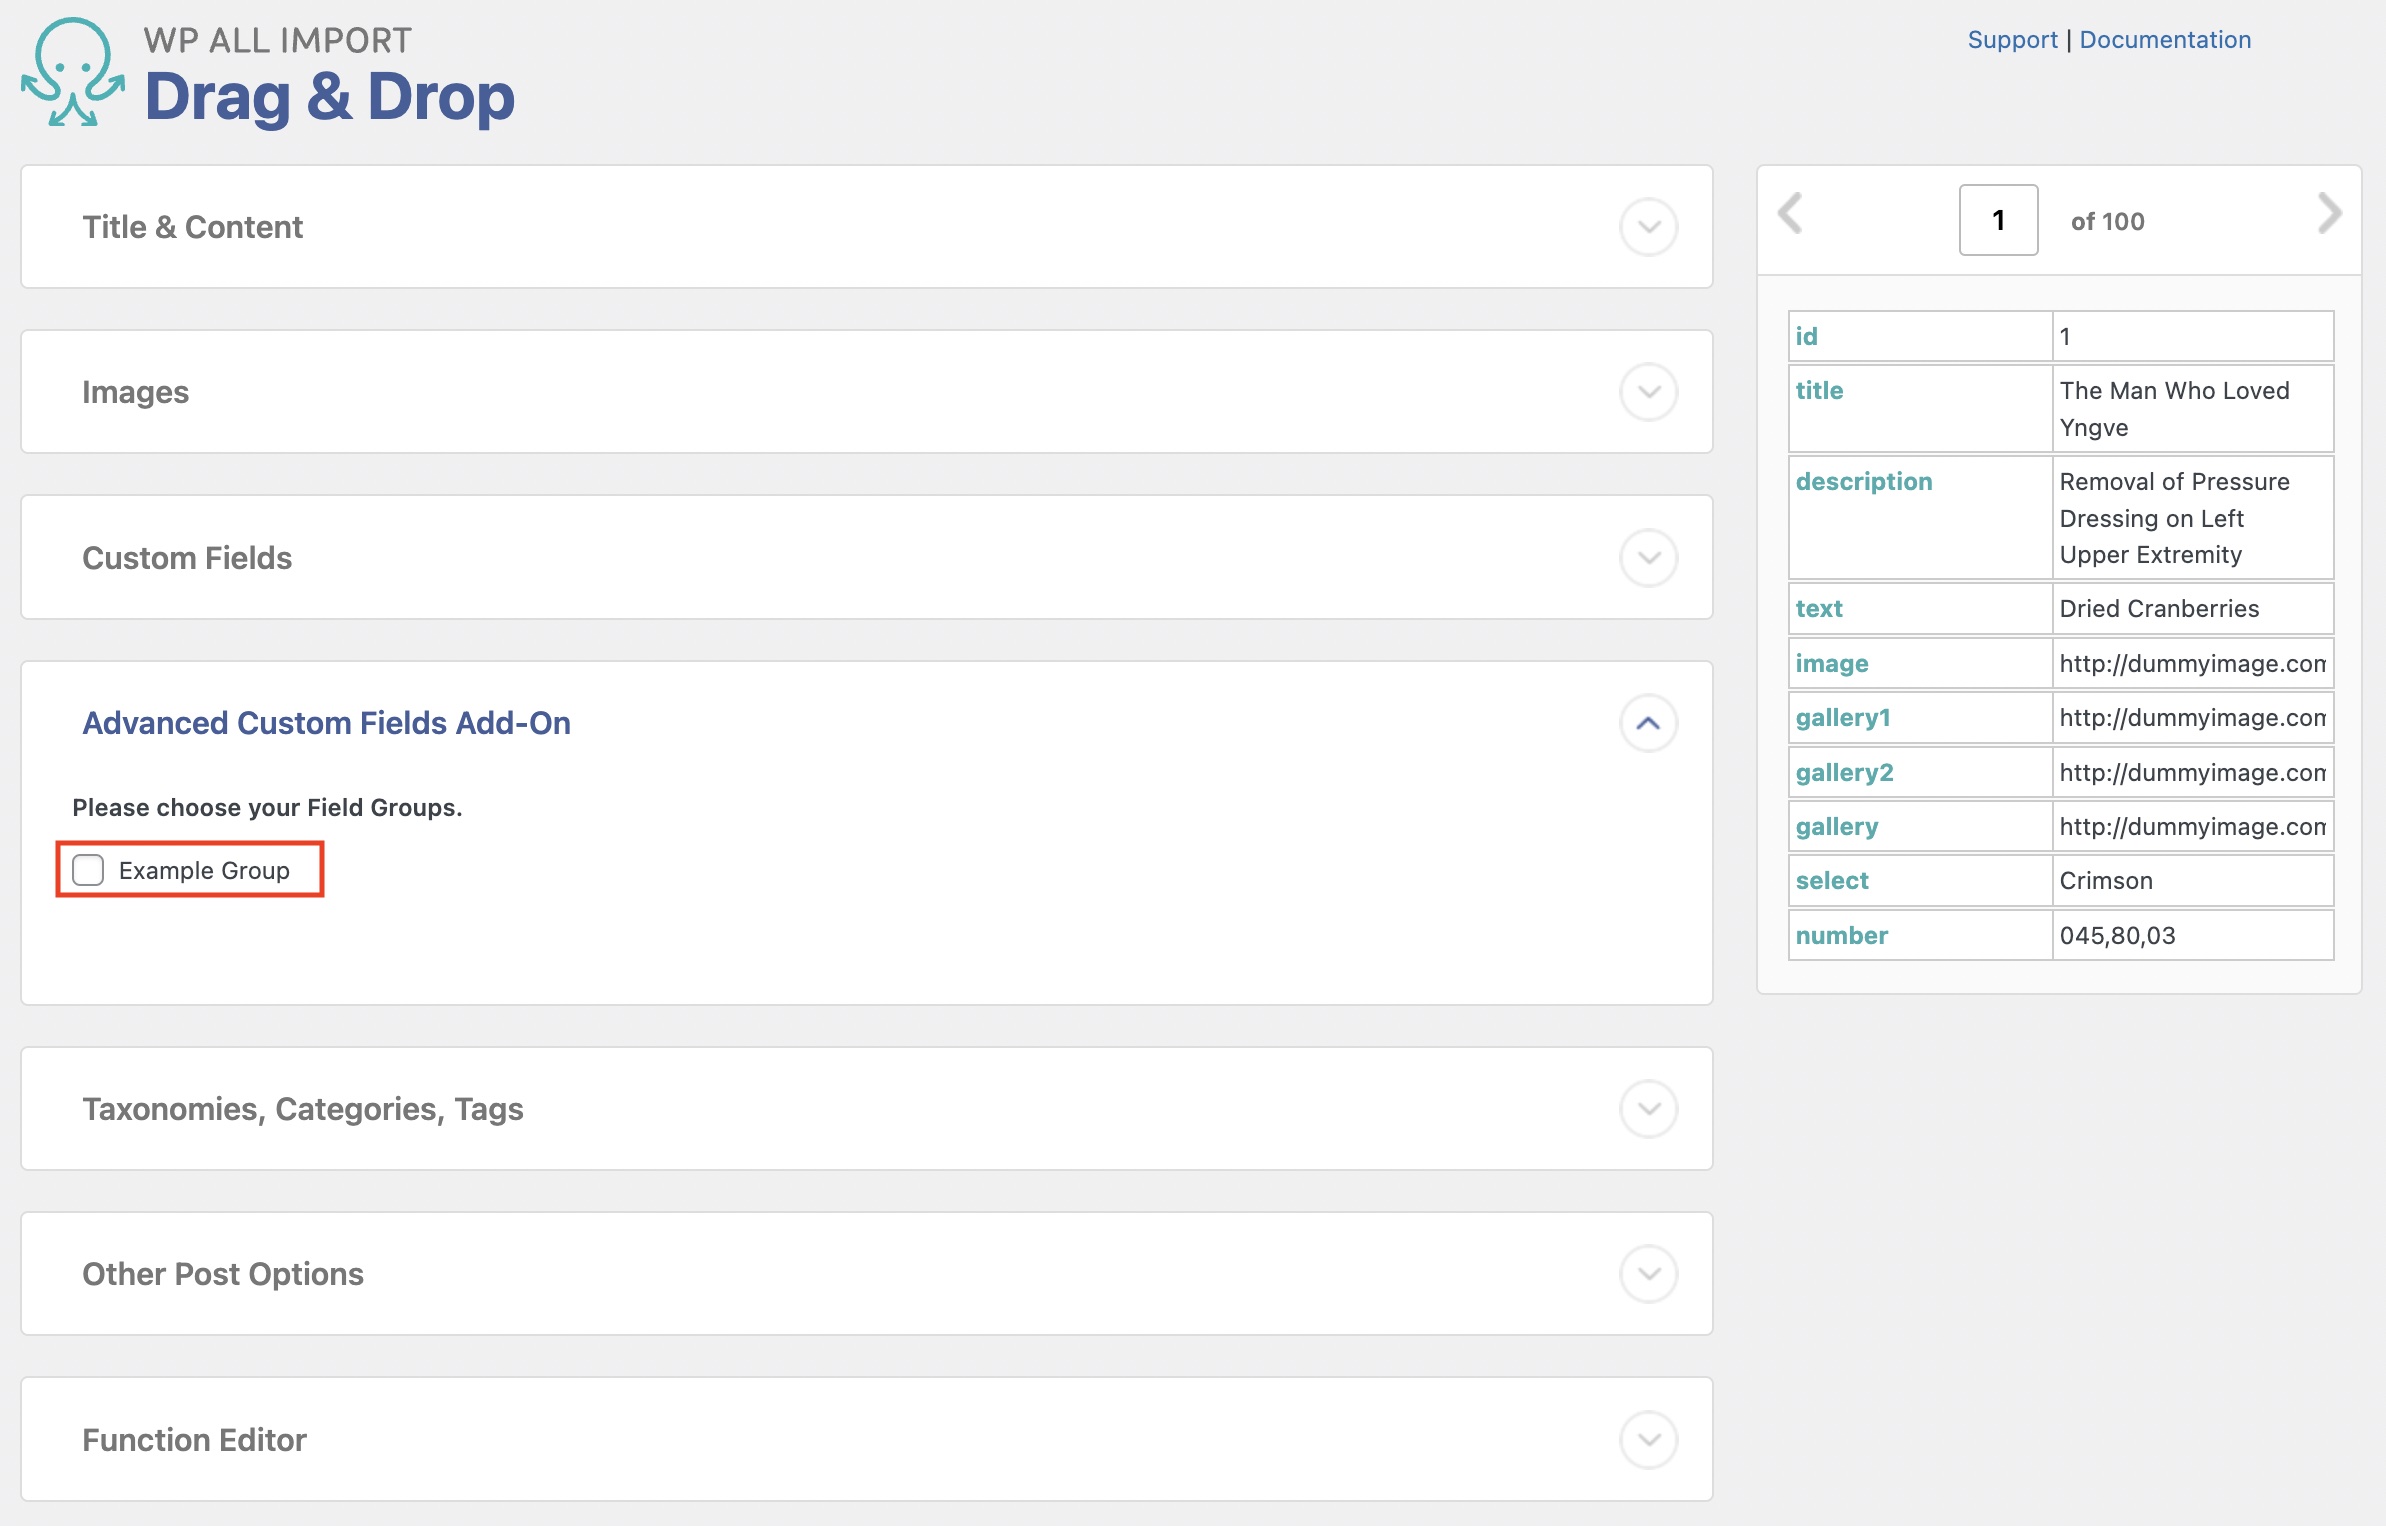
The Advanced Custom Fields Add-On section is where you define the ACF fields to import.
Locate that section by scrolling down and then enable the field group to import:
You can map each individual Advanced Custom Field as required:
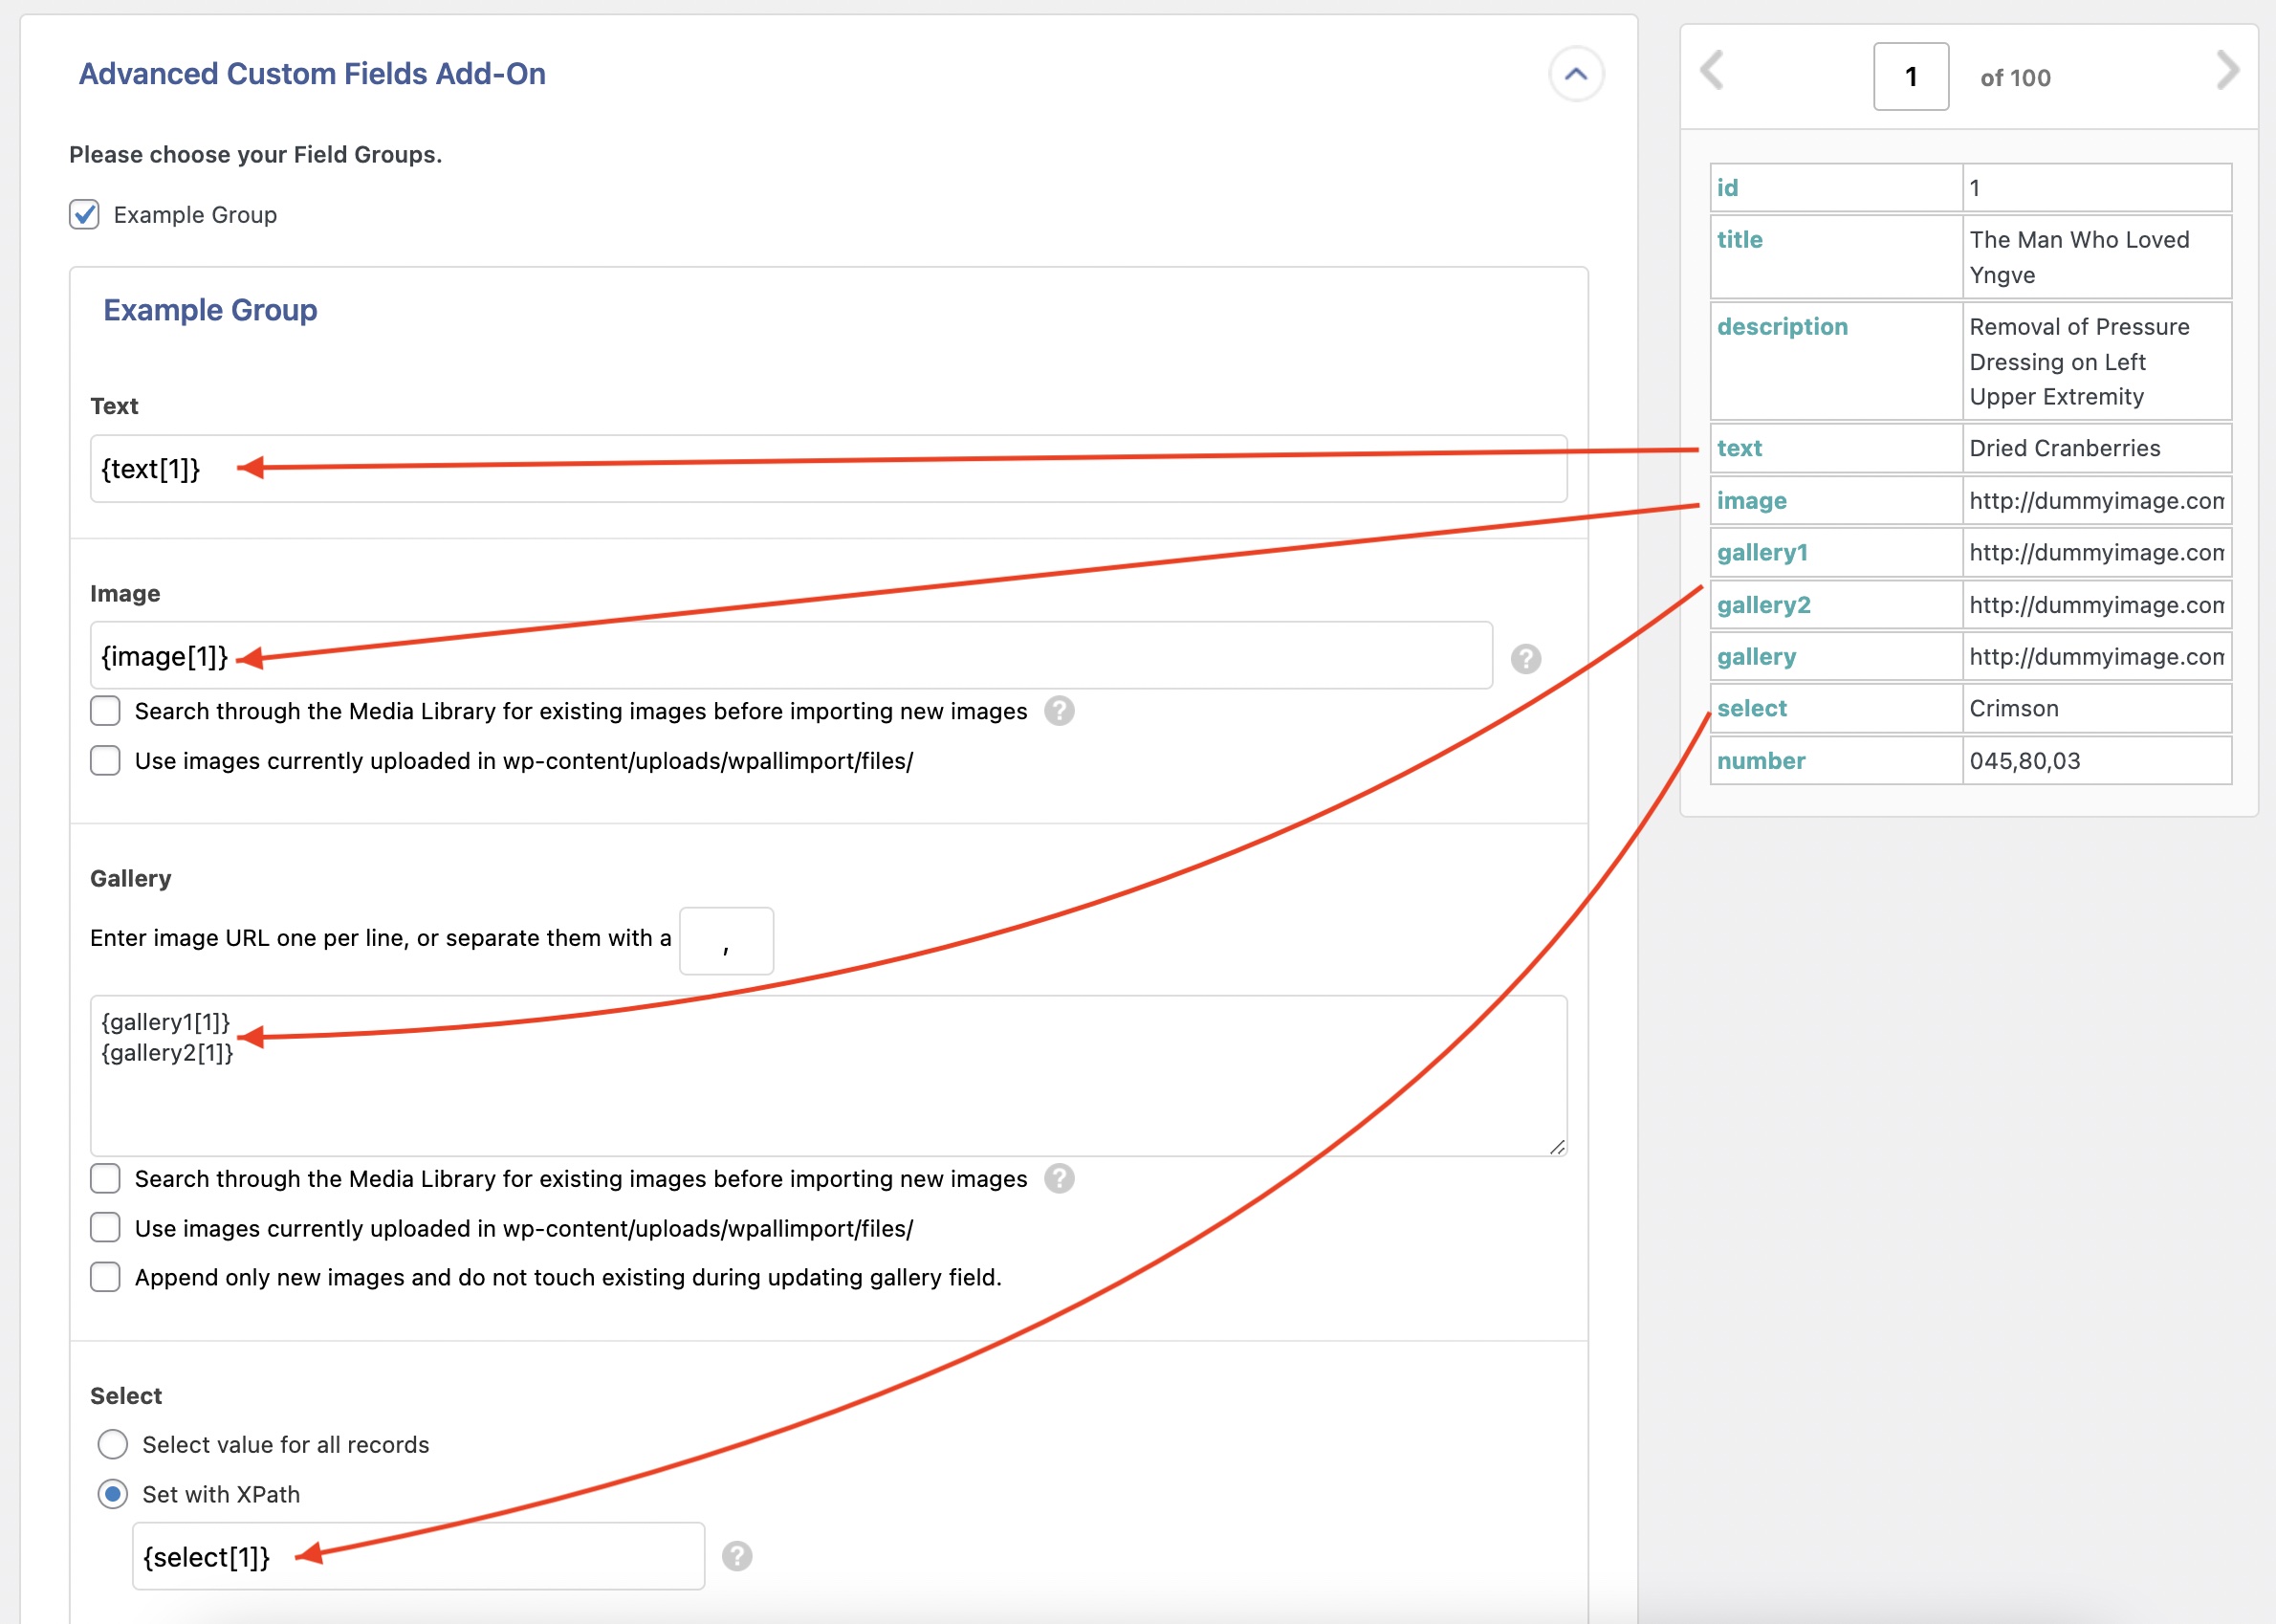
Once all of the relevant data elements are mapped to their target fields, click on Continue to Step 4 at the bottom to move to the next step.
Before proceeding, make sure that you map all other fields related to the post type or custom post type that you're importing.
The Import Settings interface is where you configure the remaining import settings and other options:

Specifically, you need to define a Unique Identifier for the import. WP All Import uses the unique identifier to keep track of imported records. To create it, simply click on Auto-detect.
You can also define this unique identifier by manually dragging and dropping fields from the right.
Here you can modify the import behavior if it is run again (to update, delete, or create new records found on the import file). You can set up Scheduling Options and Configure Advanced Settings. With most imports, there's no need to modify any of these settings.
Click the blue Continue button at the end to move to the next step.
Next, you see the Confirm & Run interface. In the Import Summary section, you can review the import, what's in the import file, and other import settings.
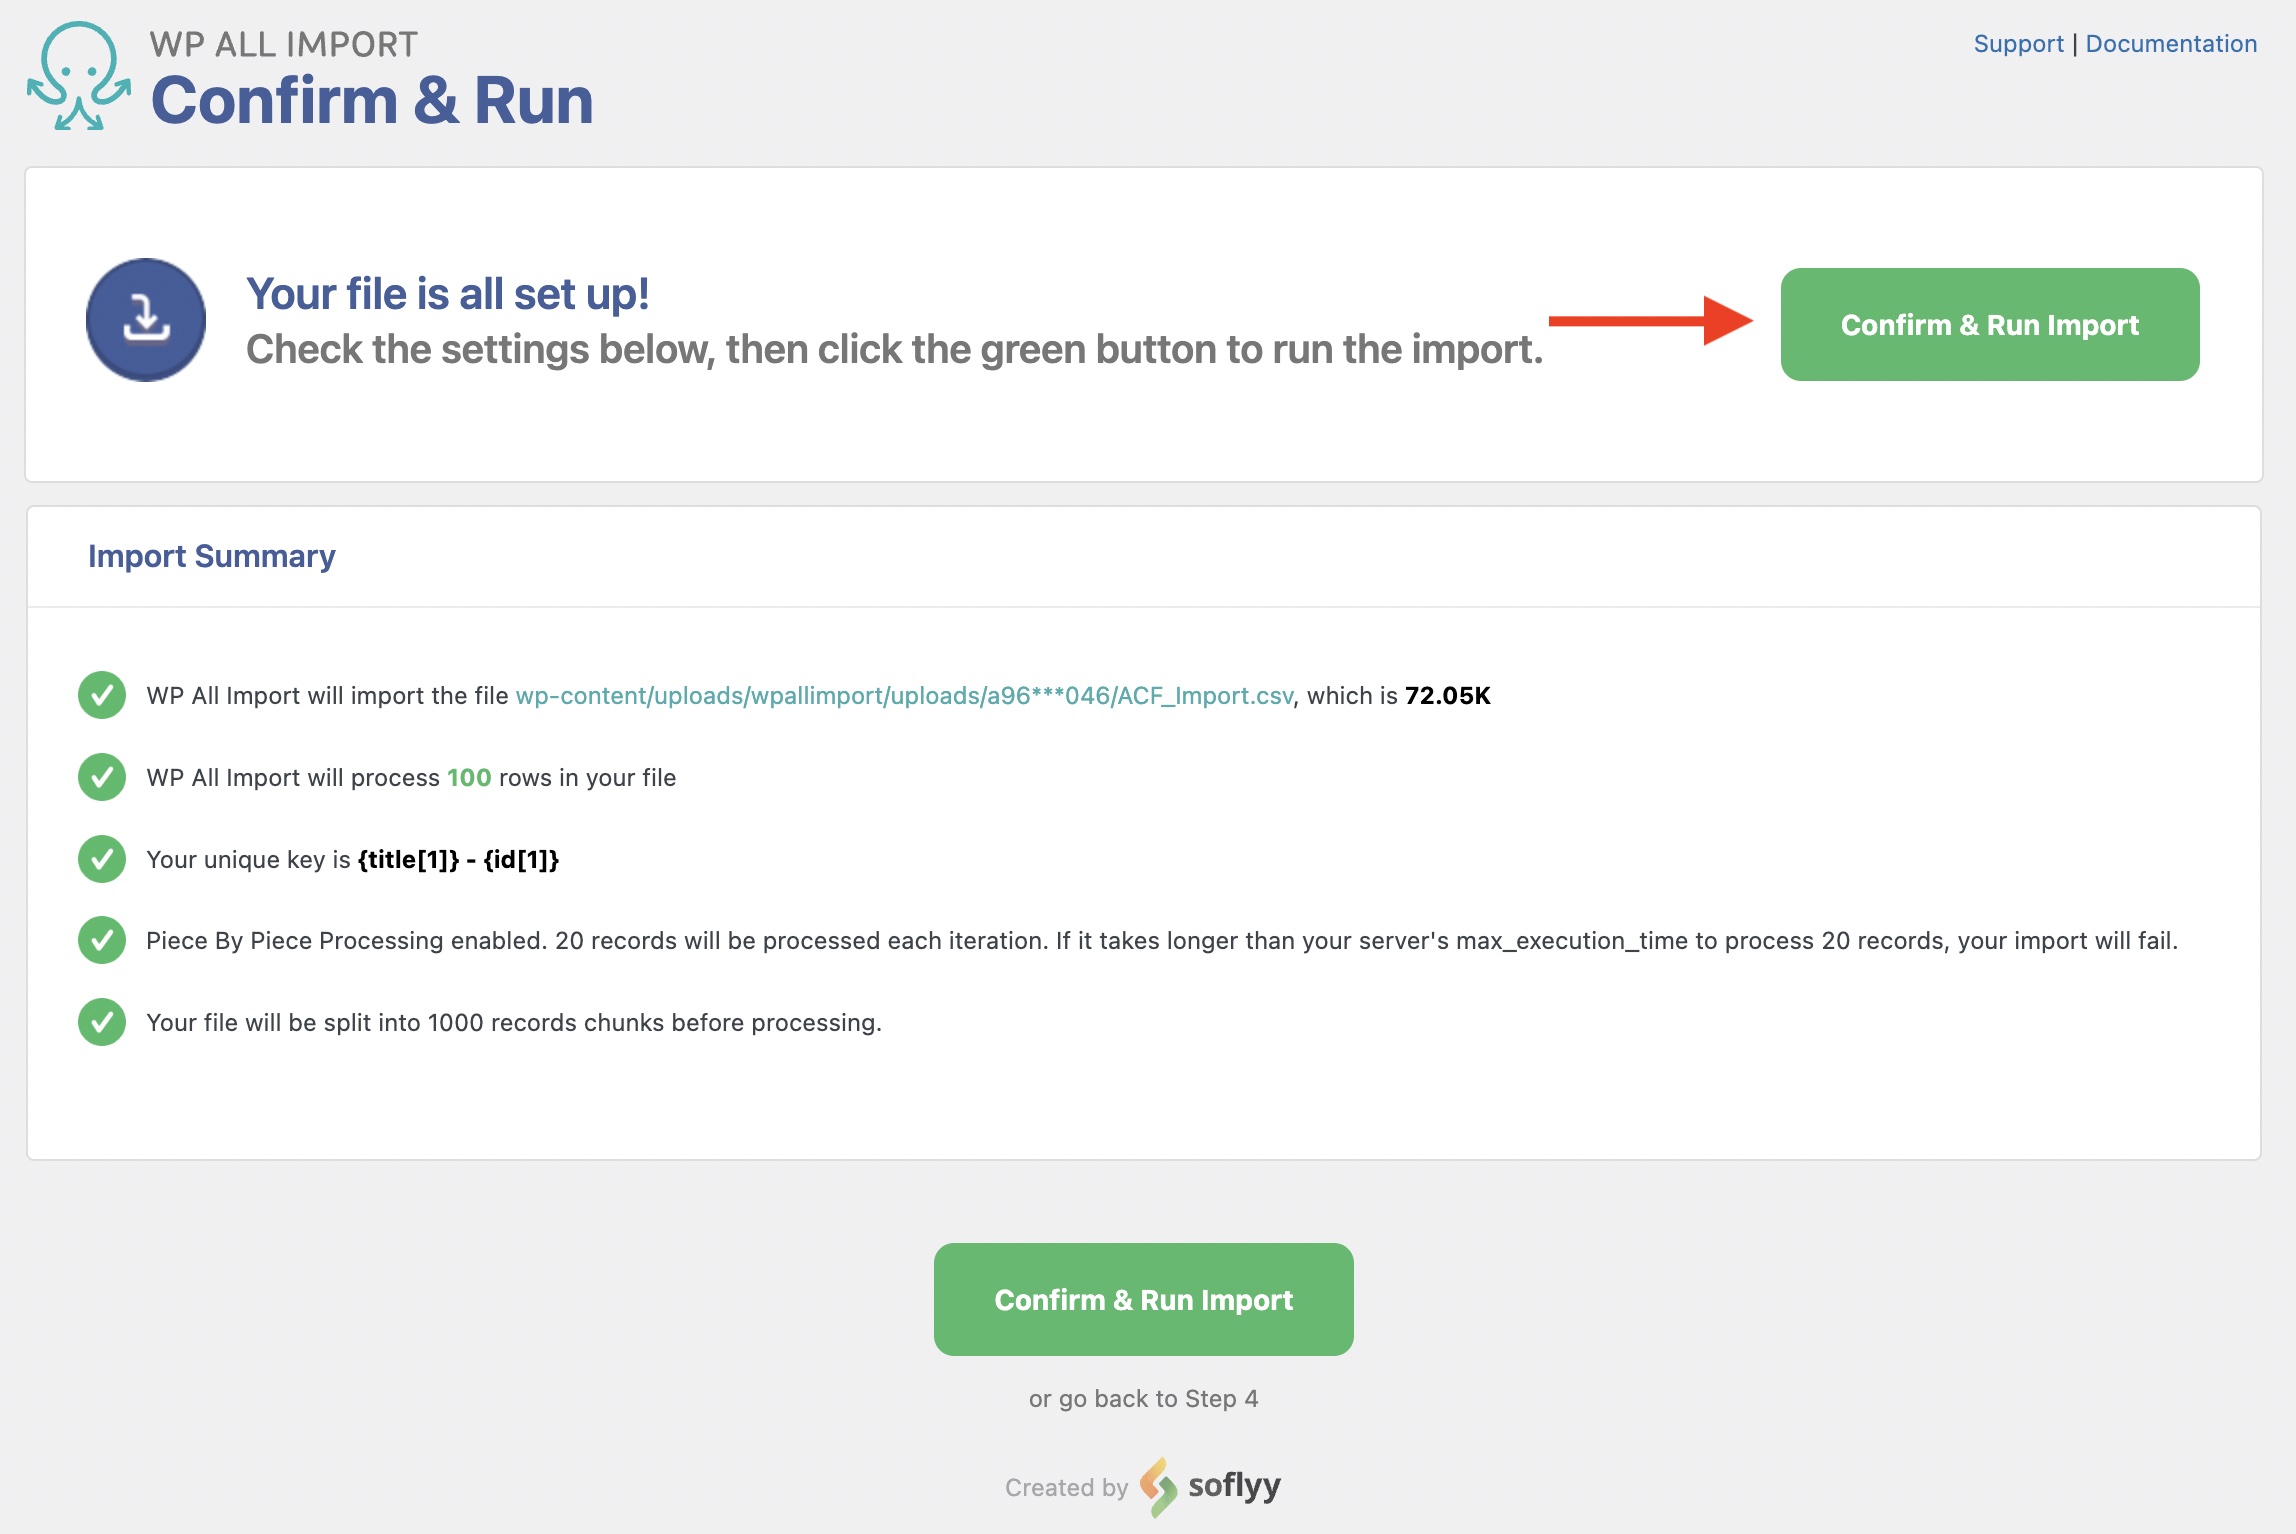
Click the green Confirm & Run Import button to execute and run this import.
When it completes, you will see the Import Complete screen:
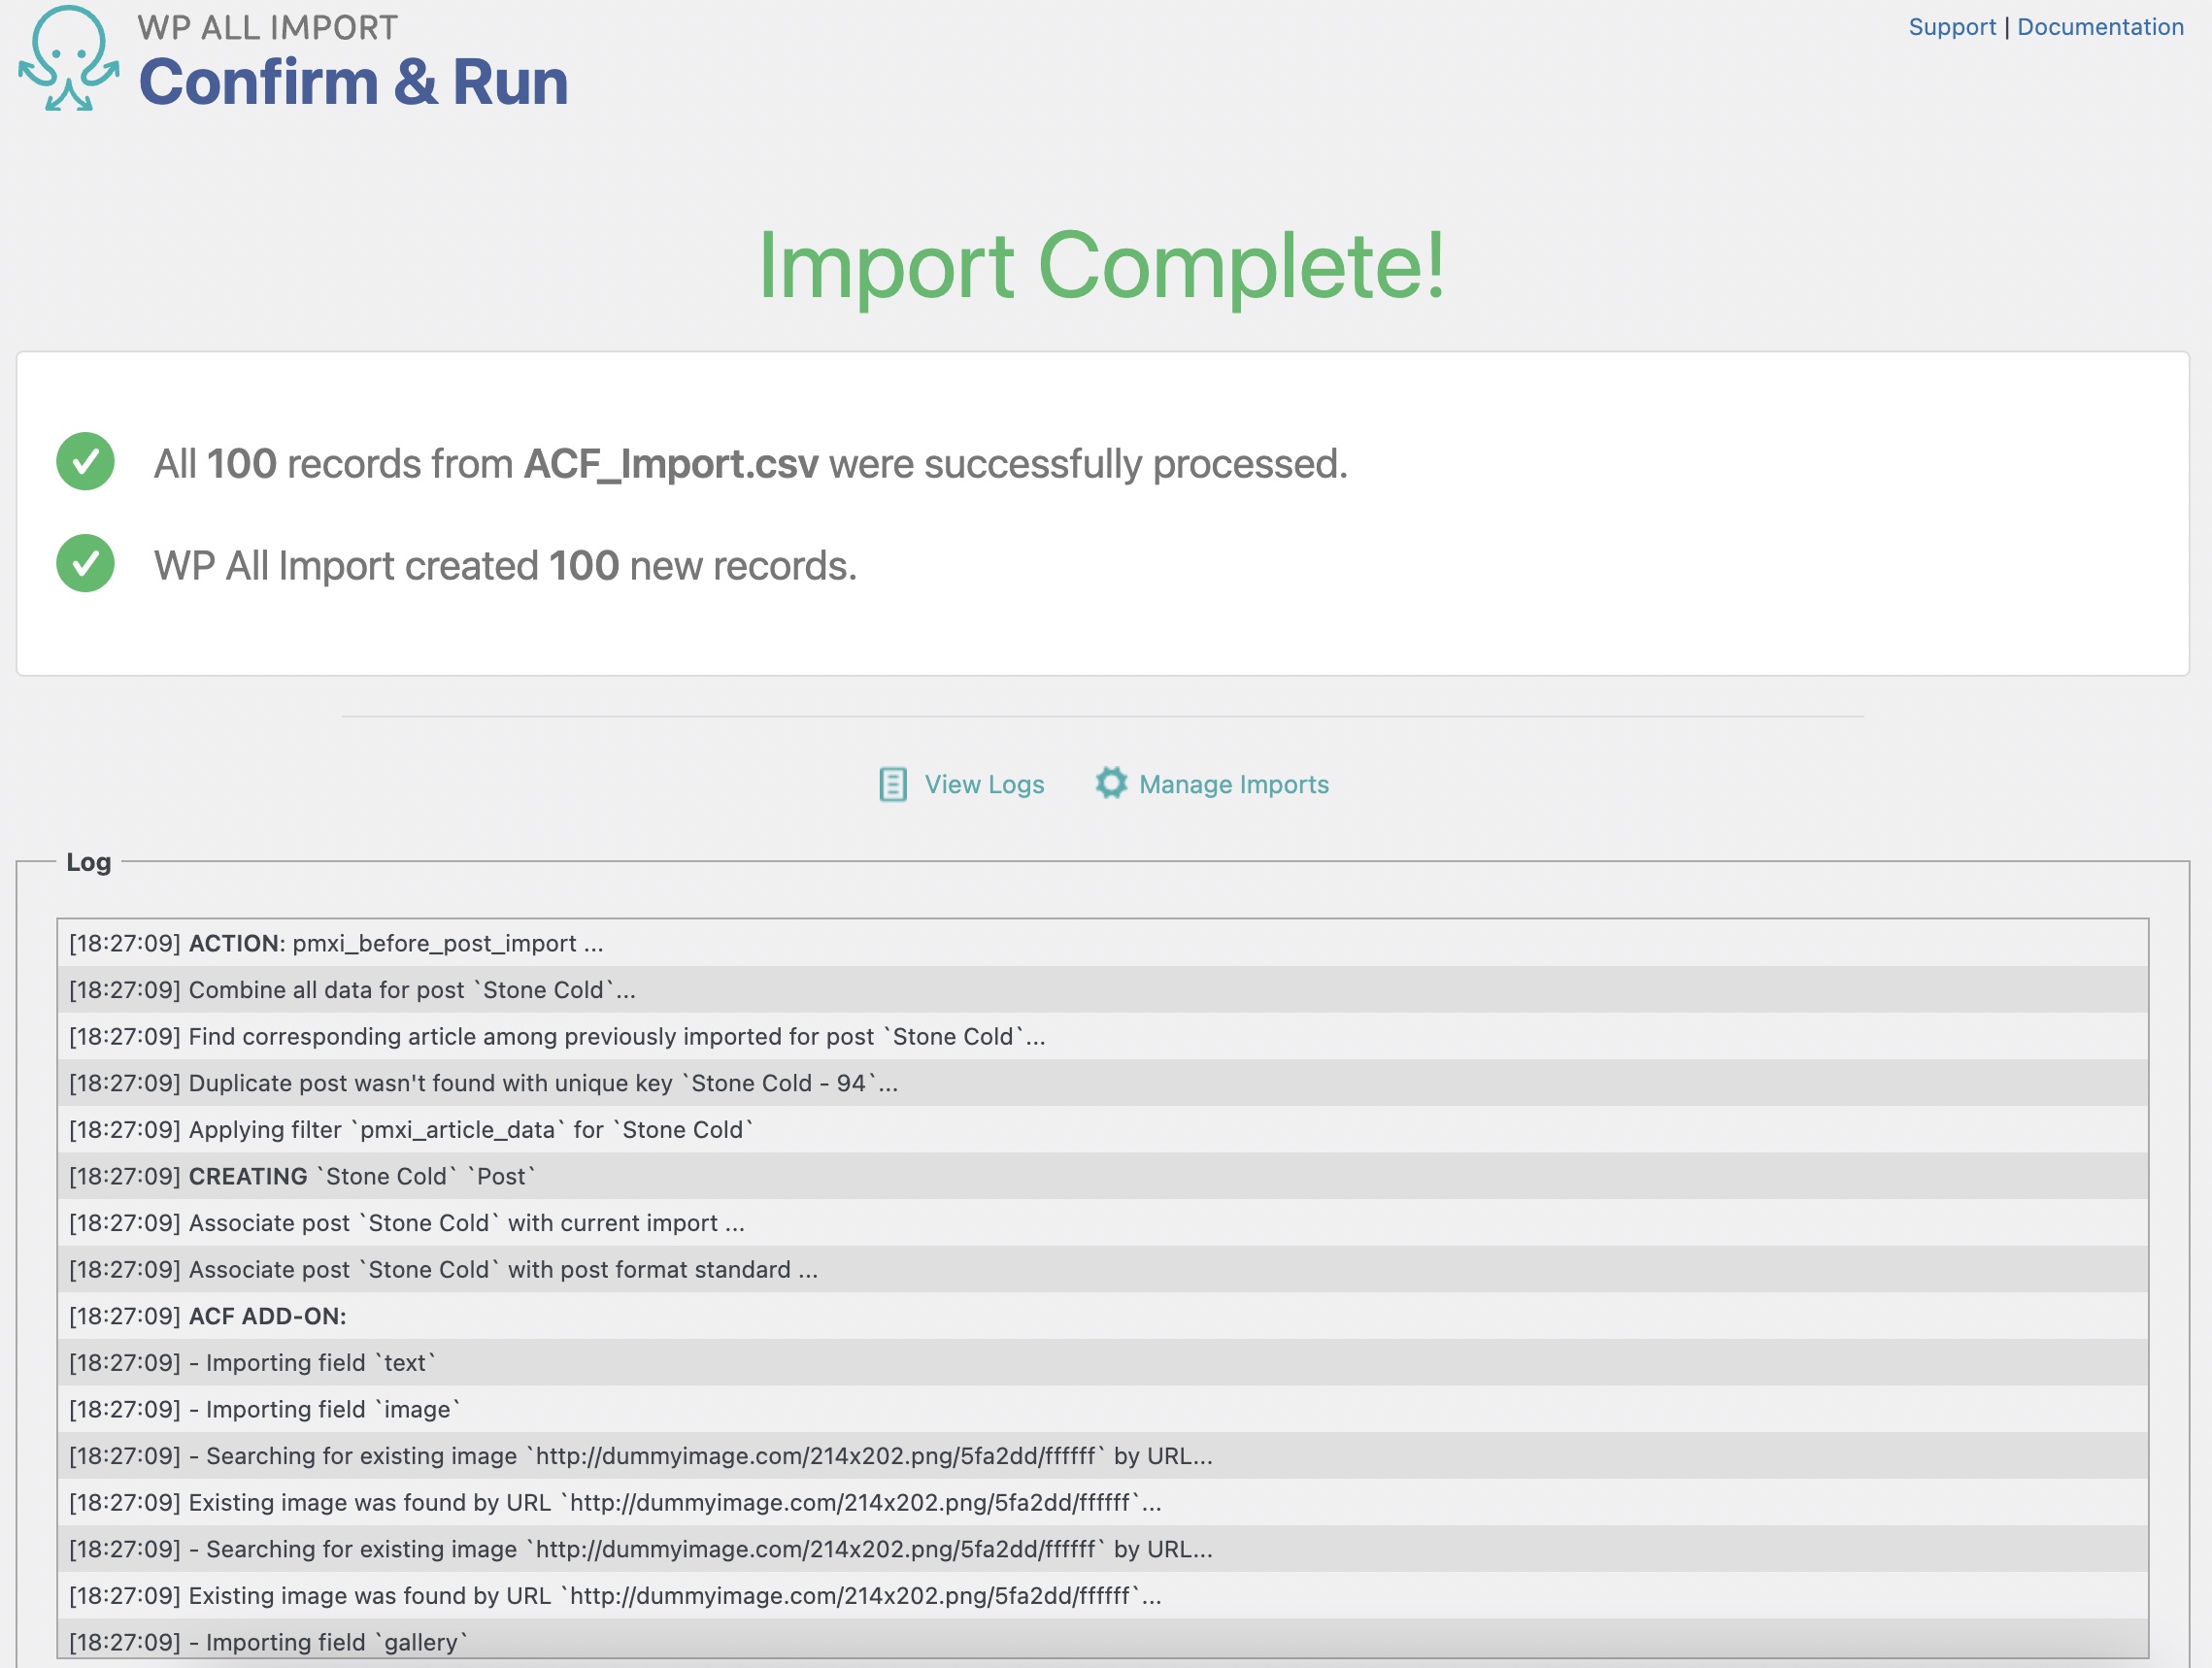
That's it! The import correctly processed the posts and ACF fields from this example.
You can review the imported fields by checking any of the imported posts in Posts › All Posts.
